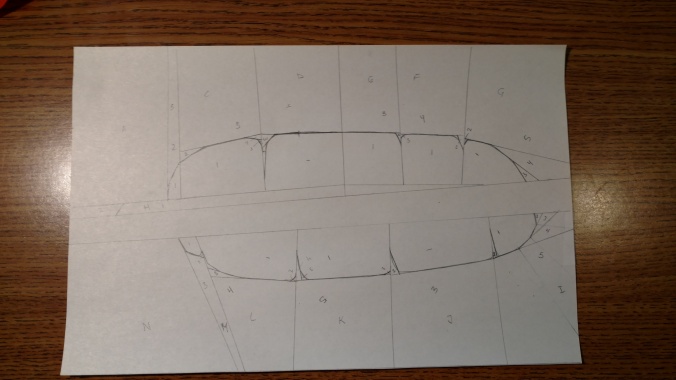
Last week I showed the first part of the process. This week, I’ll show the next steps from here. After the testing pieces, I continued by using the straight edge to draw all of the stitch lines onto the paper.
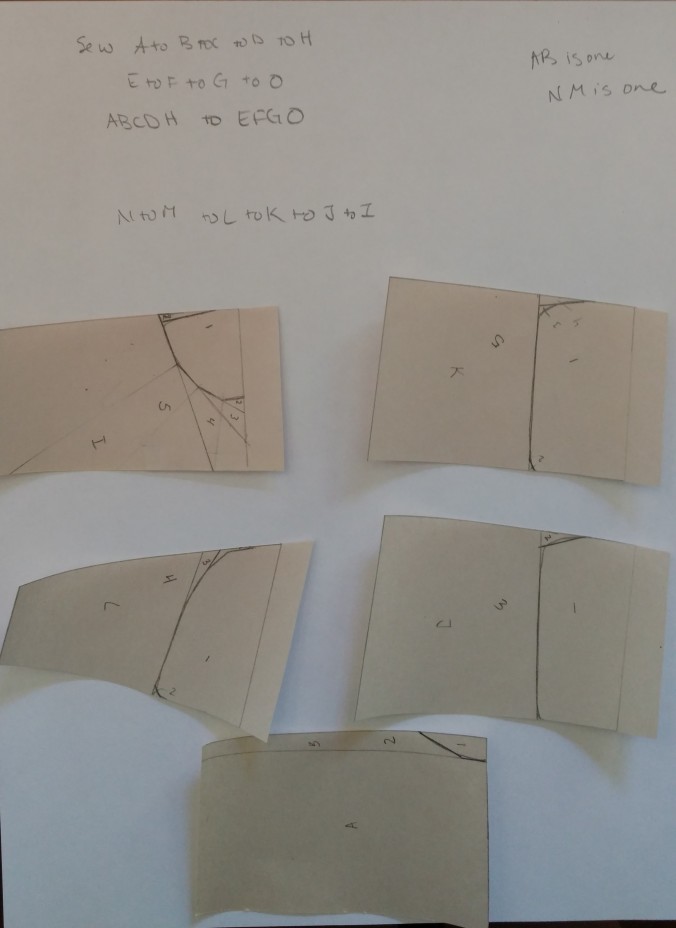
I cut apart the pattern and noted the order to sew them back together.
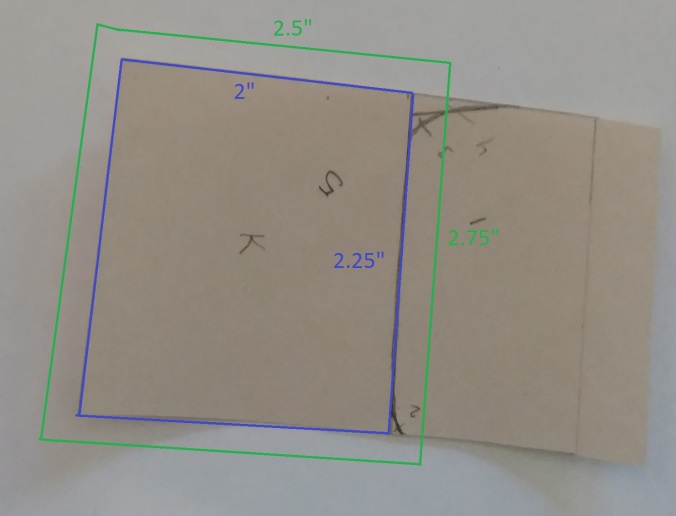
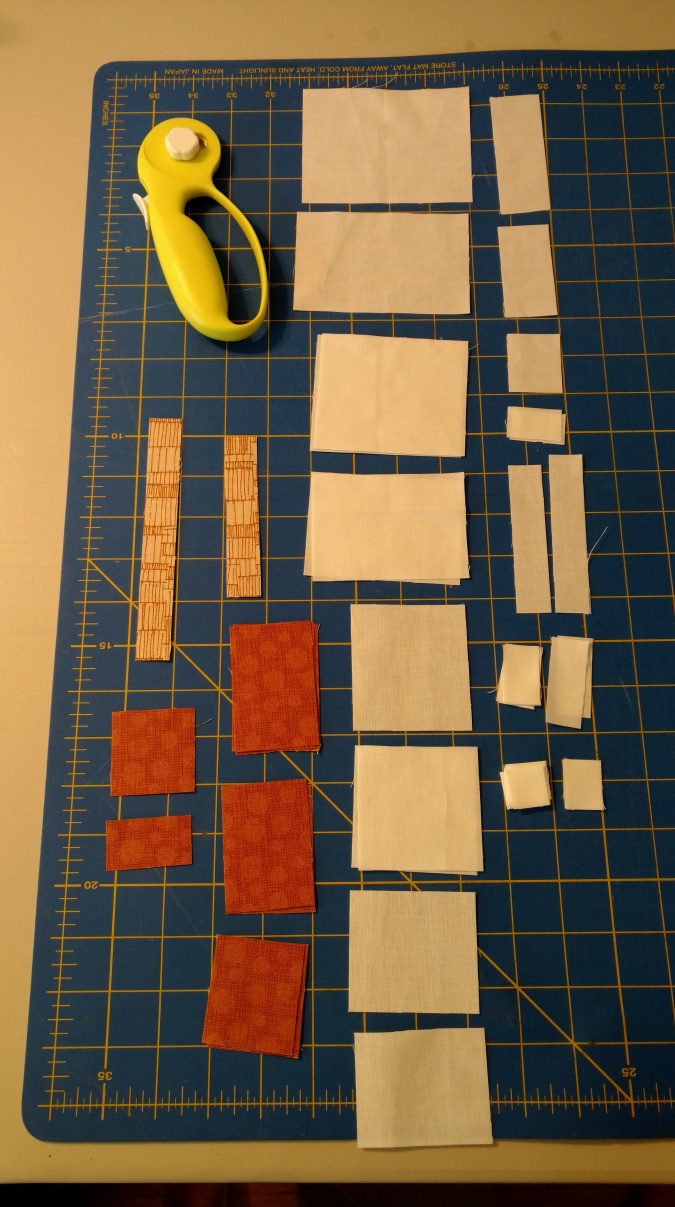
Then I measured all of the pieces in each block. To do this, I measured the size within the drawn lines (blue) and then added .5 inches in both directions for seam allowance (green). I rounded up to the nearest quarter inch to make cutting easier.
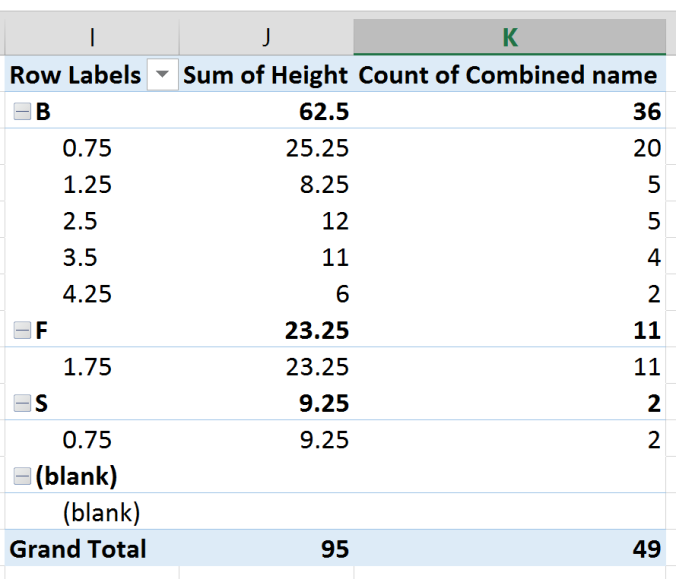
I took all of these measurements and entered them into Excel. This allowed me to use Pivot Tables to determine the lengths of fabric that I needed to cut for each width. (F stands for feather fabric, S for stem fabric, and B for background fabric.)
I used these totals to cut out all of my fabric. I first cut into strips (from the Pivot Table) and then into the smaller sizes.
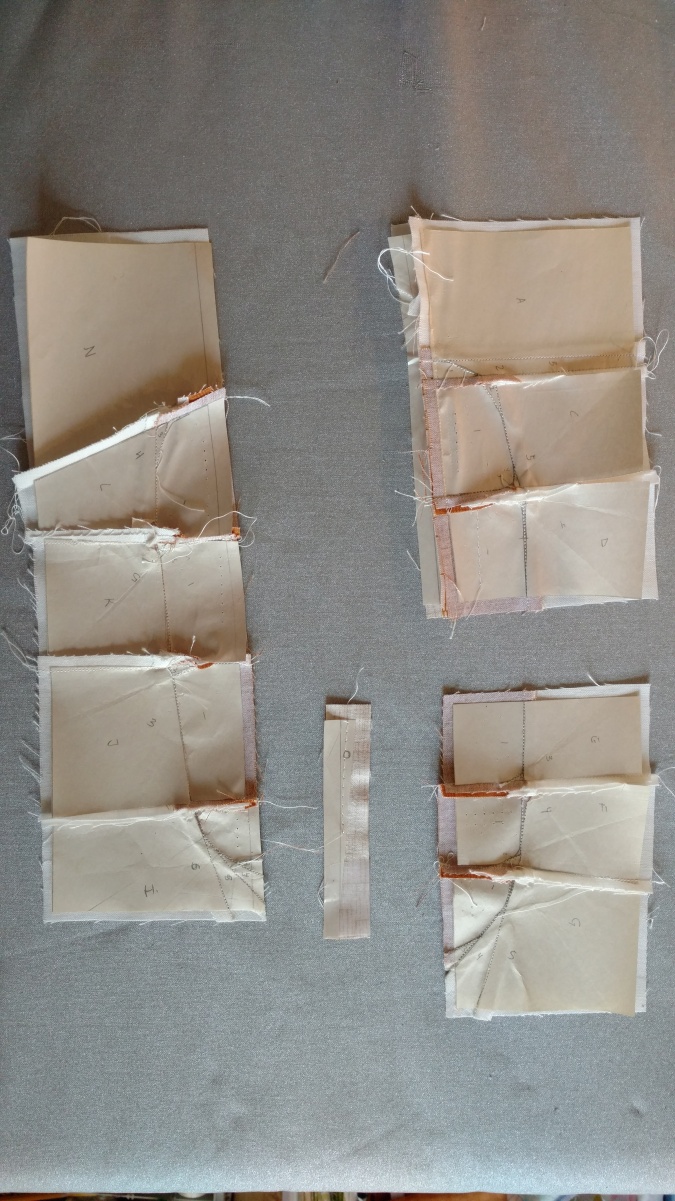
Next was assembly of the pieces. When I sew for paper piecing, I like to chain piece. I normally group pieces that have the same number of seams/stitches. Here is the set of pieces that all had 3 components with 2 seams total.


I continued the process with the other pieces. Next was assembly. I laid them out with the paper up to ensure I sewed them together correctly.
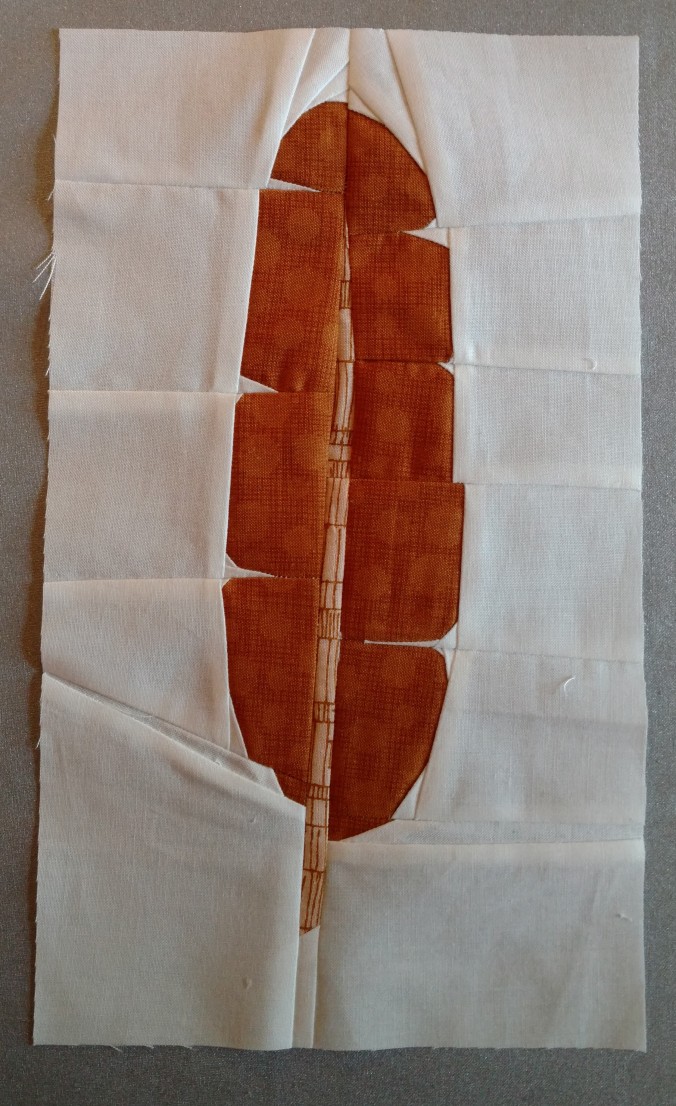
Here is the final result!
Contact me through the Contact page if you’d like the pattern.
